
Halo teman-teman, ada cara lain pop jquery Facebook untuk facebook seperti widget kotak untuk blogger (atau) situs. Keuntungan widget ini adalah untuk ruang kosong pada halaman. Karena Facebook dapat mencegah situs normal seperti kotak. Pop statis Out Facebook sebagai kotak lembut dengan efek jQuery aktivasi untuk blogger, ini merupakan salah satu kontrol dingin. Di sini saya telah ditambahkan sebagai kotak dengan efek jQuery sederhana hover. Lihat plate Facebook statis di sebelah kanan halaman dan menggerakkan mouse di atas piring dengan frame, seperti terlihat dengan menggeser ke kiri.
Cara Tambah Facebook Static Seperti Kotak dengan Jquery halus Hover untuk Blog Anda
Berikut Ada 2 Langkah Sederhana
Langkah 1:
Menambahkan Plugin Jquery JavaScript (Abaikan langkah ini jika blog Anda sudah punya Plugin Jquery)
a. Pergi ke Dashboard Blogger <Desain tab> Edit Html
b. Cari </ head> tag (menggunakan ctrl + f)
c. Tambahkan bawah baris kode Sebelum </ head> tag
Langkah 2: Menambahkan Kode Widget (Html code) itu Sederhana
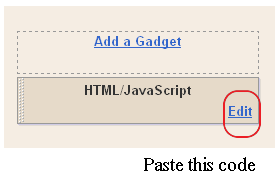
a.Layout atau halaman elemen >> Tambah gadget->> Html / java script.
b.Add kode di bawah ini di kotak scipt Html / java.
Ganti URL halaman facebook saya di bawah ini dengan URL untuk halaman Anda.
(Catatan: - URL Facebook Harus dimulai dengan "http://" dan tidak berisi ruang atau Karakter ilegal)
Step 2: Adding Widget Code ( Html code )
it's Simple
a.Layout or page elements �>> Add a gadget->> Html/java script.
b.Add a below code in the Html/java scipt box.
Replace my facebook page URL below with the URL for your page.
(Note:- Facebook URL Must starting with "http://" and it contains no space or illegal Characters )
And now click Save
Note:-Don�t forget to change Red colour keywords.
Add jQuery Pop-up For Facebook Like Box With Background Image

I had given to Facebook as jQuery popup box and jQuery to facebook emerging as the box with the background image in my previous post, if you are new here, that the first visit, now I'm back with the same widget, just change the background image and the size of this widget. I just tried this and I hope you enjoyed it.
How To Add A Awesome Facebook Fan Page JavaScript For Blogger
I have to write two set of instructions for each steps, as some of you are using the default layout, and some of you are using the new layout.Backup your template before attempting this tutorial.
Step 1:
In old layout: Go to Dashboard - Design - Edit HTML - Expand Widget Templates.

In new layout: Go to Dashboard - Template - Edit Template HTML - Expand Widget Templates.

Now find (CTRL+F) this code in the template:
And exactly before it add the next code :
Now Click Save Template
Note :- Do not add above red colored jQuery plugin if your blog already jQuery plugin.
Adding HTML Code :
I have to write two set of instructions for each steps, as some of you are using the default layout, and some of you are using the new layout. So, let's see how to install this cool widget in your blog...
Step 1:
If you're using the old Blogger interface: Go to Dashboard - Design - Page Elements - Add a Gadget.
 Add a Gadget of HTML/JavaScript type.
 If you're using the new Blogger interface: Go to Dashboard - Layout - Add a Gadget
 2.Click on 'Add a Gadget' on the sidebar.
3.Select 'HTML/Javascript' and add the one of code given below
4. Now Click On Save 'JavaScript' You are done.
And now click Save
Edit
Replace in above red colored number with your facebook page id
Add a Awesome jQuery Pop-Up For Facebook Like Box

Setelah widget baru-baru ini saya Popup Adsense. Sekarang saya memutuskan untuk menyajikan beberapa segar untuk apa yang datang dengan Kotak Popup bagus jQuery ke Facebook sebagai. Ini adalah widget yang sangat baik untuk meningkatkan rasa. Anda dapat melihat sebagian besar situs atau blog yang digunakan untuk meningkatkan pop dibayar, penggemar dan pendukung. Ini jQuery popup lucu untuk Facebook Sebagai kotak adalah widget blogger besar. Begitu pengunjung baru yang datang ke blog Anda akan menampilkan pengunjung pop, yang dapat membantu meningkatkan ukuran dan mendapatkan lebih banyak lalu lintas ke tutorial berikutnya Facebook.In saya akan mencoba untuk membuatnya lebih interaktif dengan link ke profil media sosial dan versi lengkap dengan segala isinya, yang dapat menunjukkan need.Check keluar ke bawah dan saya akan menunjukkan kepada Anda bagaimana untuk menambahkan lucu Popup jQuery untuk Facebook sebagai kotak untuk Blogger atau Wordpress?
So, let's see how to install this cool widget in your blog..
1. Masuk ke Blogger dashboard
And now click Save Template
Now add the HTML code to blogger
it's simple
1. Masuk ke Blogger dashboard
Blogger lama antarmuka: Pergi ke Dashboard - Desain - Elemen Halaman - Tambahkan Gadget.If Anda menggunakan antarmuka Blogger baru: Pergi ke Dashboard - Layout - Menambahkan Gadget.Select 'HTML / Javascript' dan tambahkan salah satu kode yang diberikan below.Just copy dan paste kode ini ..
And now click Save
Note:- Replace pages%2FBlogspot-tutorial%2F220888831260608 With your Facebook User name
Now you have done !!!
StickyBar With Facebook Like and Google+ Button
StickyBar Dengan Facebook Like dan Button Google+ merupakan versi disesuaikan bar ucapan, tetapi tidak memiliki iklan dan dengan mudah dapat ditata dan disesuaikan untuk berbaur template blog Anda. Karena itu selalu lebih baik untuk memiliki widget kustom Anda sendiri sehingga kami merancang bar sederhana yang menempel pada bagian atas blog atau website untuk menarik perhatian semua pengunjung. Kedua plugin sosial membantu meningkatkan basis penggemar mereka. Facebook button serta dihubungkan ke halaman fan Anda, sehingga siapa pun dapat menjadi penggemar. Mari kita pergi bekerja kemudian!
 Follow these easy steps:
1. Blogger> Desain> Edit HTML
2. Backup template Anda
3. Cari kata ini ]]> </ b: skin>
4. Masukkan code CSS dibawah ini diatas ]]> </ b: skin>
Ganti trik blogger dengan Username Facebook Fan Page dan Anda mengganti link http://gusdegleng.blogspot.com/ dengan Anda.
7. Note: Skip this step if you have already added google+ button somewhere already in your blog.
Paste the following code just below ]]></b:skin>
8. Save your template and you are all done!
Visit your blogs to see it fixed at top just perfectly. :)
Customize
To change the background color of the bar simply edit #0080ff in step#4 with a color of your choice. Try our color generator tools. If you need any further help then please let me know.
Two Ways To Customize The Facebook Fan Box Widget With Css
The Facebook plugin style is unfortunately not an easy task because the details are very limited shared in the Facebook Developers page. Custom Plugins will help you stand out as a brand and market your business as well. In April 2010, Daddydesigns posted a tutorial on how to style and make the modifications to the box fan on Facebook. Your tutorial was well received, but with the introduction of Facebook as the box instead of Fan Box, change in algorithms made ??it difficult to modify the plugin using the same guide. After several trial and error, managed to make the necessary changes made ??by DaddyDesigns small to fully customize the box with flavors like custom fonts and colors. This surely would not have been possible with your help bright.
Customize Facebook Like Box With CSS

Customize Facebook Like Box Using CSS

Creating a Custom Like Box Code
Instead of using the new code provided on the developers page, we will use and modify the code provided by daddydesigns. This is the modified code you need to use:
Make these changes:
Replace in above red colored number with your facebook page id
Note :if you have setup your facebook page id with user name than use our facebook id finder tool for it .
Replace STYLE SHEET LINK with the link of the stylesheet your previously uploaded. I will mention later how to create
Your personal Facebook as the box is ready to be served! That's it. Paste this code anywhere you want and your personalized style box is displayed to perfection. If you have any problems let me know. I will post more designs and tutorials on this topic on this week.
Credits
Readers are requested to kindly link back to this page if they wish to share this working tutorial with their visitors. It's the only tutorial published after Daddydesigns tut which provides a modified solution.
Cara Tambah Facebook Static Seperti Kotak dengan Jquery halus Hover untuk Blog Anda
Berikut Ada 2 Langkah Sederhana
Langkah 1:
Menambahkan Plugin Jquery JavaScript (Abaikan langkah ini jika blog Anda sudah punya Plugin Jquery)
a. Pergi ke Dashboard Blogger <Desain tab> Edit Html
b. Cari </ head> tag (menggunakan ctrl + f)
c. Tambahkan bawah baris kode Sebelum </ head> tag
<script src="https://ajax.googleapis.com/ajax/libs/jquery/1.6.1/jquery.min.js" type="text/javascript"></script>And now click Save Template
Langkah 2: Menambahkan Kode Widget (Html code) itu Sederhana
a.Layout atau halaman elemen >> Tambah gadget->> Html / java script.
b.Add kode di bawah ini di kotak scipt Html / java.
Ganti URL halaman facebook saya di bawah ini dengan URL untuk halaman Anda.
(Catatan: - URL Facebook Harus dimulai dengan "http://" dan tidak berisi ruang atau Karakter ilegal)
Step 2: Adding Widget Code ( Html code )
it's Simple
a.Layout or page elements �>> Add a gadget->> Html/java script.
b.Add a below code in the Html/java scipt box.
Replace my facebook page URL below with the URL for your page.
(Note:- Facebook URL Must starting with "http://" and it contains no space or illegal Characters )
<a href="http://24work.blogspot.com" target="_blank" title="Blogger Widgets"><img src="http://safir85.ucoz.com/24work-blogspot/cursor-24work-10.png" border="0" alt="Blogger Widgets" style="position:absolute; top: 0px; right: 0px;" /></a><script type="text/javascript">
//<!--
$(document).ready(function() {$(".w2bslikebox").hover(function() {$(this).stop().animate({right: "0"}, "medium");}, function() {$(this).stop().animate({right: "-250"}, "medium");}, 500);});
//-->
</script>
<style type="text/css">
.w2bslikebox{background: url("https://blogger.googleusercontent.com/img/b/R29vZ2xl/AVvXsEhheVAZVhrQqQBA5258OHWNLz4bXYK2qSx8XRGwKjIWk3dHOVyaCr2ZGLdPv-iNKczIx-C5L0TgpVOi3gbHIol5LcGbkYq-6UGtn9SbkzMShSYD3pEGbr0Kd_9oImkA7wrjRO2ljgfdARJp/s1600/facebookbadge.png") no-repeat scroll left center transparent !important;display: block;float: right;height: 270px;padding: 0 5px 0 46px;width: 245px;z-index: 99999;position:fixed;right:-250px;top:20%;}
.w2bslikebox div{border:none;position:relative;display:block;}
.w2bslikebox span{bottom: 12px;font: 8px "lucida grande",tahoma,verdana,arial,sans-serif;position: absolute;right: 6px;text-align: right;z-index: 99999;}
.w2bslikebox span a{color: #808080;text-decoration:none;}
.w2bslikebox span a:hover{text-decoration:underline;}
</style><div class="w2bslikebox" style=""><div><iframe src="http://www.facebook.com/plugins/likebox.php?href=http://www.facebook.com/pages/Blogspot-tutorial/220888831260608&width=245&colorscheme=light&show_faces=true&connections=9&stream=false&header=false&height=270" scrolling="no" frameborder="0" scrolling="no" style="border: medium none; overflow: hidden; height: 270px; width: 245px;background:#fff;"></iframe><span>By <a href="http://24work.blogspot.com/">Blogspot tutorial</a> / <a href="http://24work.blogspot.com/">+Get This!</a></span></div></div>
</div>
And now click Save
Note:-Don�t forget to change Red colour keywords.
Add jQuery Pop-up For Facebook Like Box With Background Image
I had given to Facebook as jQuery popup box and jQuery to facebook emerging as the box with the background image in my previous post, if you are new here, that the first visit, now I'm back with the same widget, just change the background image and the size of this widget. I just tried this and I hope you enjoyed it.
How To Add A Awesome Facebook Fan Page JavaScript For Blogger
I have to write two set of instructions for each steps, as some of you are using the default layout, and some of you are using the new layout.Backup your template before attempting this tutorial.
Step 1:
In old layout: Go to Dashboard - Design - Edit HTML - Expand Widget Templates.
In new layout: Go to Dashboard - Template - Edit Template HTML - Expand Widget Templates.
Now find (CTRL+F) this code in the template:
</head>
And exactly before it add the next code :
<script src='http://ajax.googleapis.com/ajax/libs/jquery/1.5/jquery.min.js'/>
<a href="http://24work.blogspot.com" target="_blank" title="Blogger Widgets"><img src="http://safir85.ucoz.com/24work-blogspot/cursor-24work-10.png" border="0" alt="Blogger Widgets" style="position:absolute; top: 0px; right: 0px;" /></a><script src='http://24work.ucoz.com/24work-blogspot/facebook/-24work.blogspot.com-jquery.colorbox-min.js'/>
<link href='http://24work.ucoz.com/24work-blogspot/facebook/-24work.blogspot.com-fbpopup.css' rel='stylesheet' type='text/css'/>
<script type='text/javascript'>
jQuery(document).ready(function(){
if (document.cookie.indexOf('visited=flase') == -1) {
var fifteenDays = 1000*60*60*24*30;
var expires = new Date((new Date()).valueOf() + fifteenDays);
document.cookie = "visited=true;expires=" + expires.toUTCString();
$.colorbox({width:"600px", inline:true, href:"#mdfb"});
}
});
</script>
Now Click Save Template
Note :- Do not add above red colored jQuery plugin if your blog already jQuery plugin.
Adding HTML Code :
I have to write two set of instructions for each steps, as some of you are using the default layout, and some of you are using the new layout. So, let's see how to install this cool widget in your blog...
Step 1:
If you're using the old Blogger interface: Go to Dashboard - Design - Page Elements - Add a Gadget.
3.Select 'HTML/Javascript' and add the one of code given below
4. Now Click On Save 'JavaScript' You are done.
<a href="http://24work.blogspot.com" target="_blank" title="Blogger Widgets"><img src="http://safir85.ucoz.com/24work-blogspot/cursor-24work-10.png" border="0" alt="Blogger Widgets" style="position:absolute; top: 0px; right: 0px;" /></a><div style='display:none'>
<div id='mdfb' style='padding:10px; background:#000;'>
<center>
<table align="center" background="https://blogger.googleusercontent.com/img/b/R29vZ2xl/AVvXsEh5R5_a_8k4pBh6ZaowptvUKS-lleGKoHSxRzIuZBTIlFIX80G5klChr88G8UEn6nBmUM7KkxF9ve0xvZogTH2JLiEUGWeq1N8SaKGqd4rvPMTkvoGTrZRE02-pVfEjd-gR5ojuZ-npwQc/s1600/www.24work.blogspot.gif" border="0" style="width: 465px; height: 300px; "><tbody>
<tr><td height="330" width="465">
<div align="left">
<script src="http://static.ak.connect.facebook.com/js/api_lib/v0.4/FeatureLoader.js.php" type="text/javascript"></script>
<script type="text/javascript">FB.init("32eb3732082b27e7c314feb421a56208");</script>
<fb:fan profile_id="220888831260608" connections="10" width="330" height="300" css="http://24work.ucoz.com/24work-blogspot/facebook/-www.24work.blogspot.com-fblikeboxwithbgimg.css?"></fb:fan>
</div></td></tr></tbody></table></center>
<p style=" float:right; margin-right:35px; font-size:9px;" >Powered By <a style=" font-size:9px; color:#3B78CD; text-decoration:none;" href="http://24work.blogspot.com">Blogger Widgets</a></p>
</div></div>
And now click Save
Edit
Replace in above red colored number with your facebook page id
220888831260608
Note :if you have setup your facebook page id with user name than use our facebook id finder tool for it .Add a Awesome jQuery Pop-Up For Facebook Like Box
So, let's see how to install this cool widget in your blog..
1. Masuk ke Blogger dashboard
- Dalam layout lama: Pergi ke Dashboard - Desain - Edit HTML - Expand Template Widget.
- Dalam layout baru: Pergi ke Dashboard - Template - Edit Template HTML - Expand Template Widget.
- Cari tag </ head> (menggunakan ctrl + f)
- Copy n tempel kode di bawah ini tepat di atas / sebelum </ head> tag.
<script src='http://ajax.googleapis.com/ajax/libs/jquery/1.5/jquery.min.js'/>
<a href="http://24work.blogspot.com" target="_blank" title="Blogger Widgets"><img src="http://safir85.ucoz.com/24work-blogspot/cursor-24work-10.png" border="0" alt="Blogger Widgets" style="position:absolute; top: 0px; right: 0px;" /></a><script src='http://24work.ucoz.com/24work-blogspot/facebook/-24work.blogspot.com-jquery.colorbox-min.js'/>
<link href='http://24work.ucoz.com/24work-blogspot/facebook/-24work.blogspot.com-fbpopup.css' rel='stylesheet' type='text/css'/>
<script type='text/javascript'>
jQuery(document).ready(function(){
if (document.cookie.indexOf('visited=flase') == -1) {
var fifteenDays = 1000*60*60*24*30;
var expires = new Date((new Date()).valueOf() + fifteenDays);
document.cookie = "visited=true;expires=" + expires.toUTCString();
$.colorbox({width:"400px", inline:true, href:"#mdfb"});
}
});
</script>
And now click Save Template
Now add the HTML code to blogger
it's simple
1. Masuk ke Blogger dashboard
Blogger lama antarmuka: Pergi ke Dashboard - Desain - Elemen Halaman - Tambahkan Gadget.If Anda menggunakan antarmuka Blogger baru: Pergi ke Dashboard - Layout - Menambahkan Gadget.Select 'HTML / Javascript' dan tambahkan salah satu kode yang diberikan below.Just copy dan paste kode ini ..
<a href="http://24work.blogspot.com" target="_blank" title="Blogger Widgets"><img src="http://safir85.ucoz.com/24work-blogspot/cursor-24work-10.png" border="0" alt="Blogger Widgets" style="position:absolute; top: 0px; right: 0px;" /></a><div style='display:none'>
<div id='mdfb' style='padding:10px; background:#fff;'>
<h3 class="mdbox-title">Receive all updates via Facebook. Just Click the Like Button Below<center><p style="line-height:3px;" >?</p></center></h3>
<center>
<iframe src="//www.facebook.com/plugins/likebox.php?href=http%3A%2F%2Fwww.facebook.com%2Fpages%2FBlogspot-tutorial%2F220888831260608&width=300&colorscheme=light&show_faces=true&border_color=%23ffffff&stream=false&header=false&height=258" scrolling="no" frameborder="0" style="border:none; overflow:hidden; width:300px; height:258px;" allowtransparency="true"></iframe></center>
<p style=" float:right; margin-right:35px; font-size:9px;" >Powered By <a style=" font-size:9px; color:#3B78CD; text-decoration:none;" href="http://24work.blogspot.com">Blogger Widgets</a></p>
</div>
</div>
And now click Save
Note:- Replace pages%2FBlogspot-tutorial%2F220888831260608 With your Facebook User name
Now you have done !!!
StickyBar With Facebook Like and Google+ Button
StickyBar Dengan Facebook Like dan Button Google+ merupakan versi disesuaikan bar ucapan, tetapi tidak memiliki iklan dan dengan mudah dapat ditata dan disesuaikan untuk berbaur template blog Anda. Karena itu selalu lebih baik untuk memiliki widget kustom Anda sendiri sehingga kami merancang bar sederhana yang menempel pada bagian atas blog atau website untuk menarik perhatian semua pengunjung. Kedua plugin sosial membantu meningkatkan basis penggemar mereka. Facebook button serta dihubungkan ke halaman fan Anda, sehingga siapa pun dapat menjadi penggemar. Mari kita pergi bekerja kemudian!
1. Blogger> Desain> Edit HTML
2. Backup template Anda
3. Cari kata ini ]]> </ b: skin>
4. Masukkan code CSS dibawah ini diatas ]]> </ b: skin>
Selanjutnya cari kata </ head> dan paste kode Javascript berikut tepat di atasnya/*24work.blogspot.com Stickybar*/
#mbt_bar{
background:#0080ff url('https://blogger.googleusercontent.com/img/b/R29vZ2xl/AVvXsEg4YWY9dtvSAsnCBcJqBA98sNLwxokG-ff6maHgVkRCgSZfr4uenmpBaqv0vlHgrbbfDaqQYONwK7EdZl0GvGBlbNCNX8FT0uTWVJphCOuounChspP0GZvGEdwtr6FBpsl3_T9pV9lzDCdD/s400/stickybar.png') repeat-x;
width:100%;
margin:0 auto;
text-align:center;
padding:3px 0 0 0;
border-bottom: 1px solid #888888;
-moz-box-shadow: #666666 0px 1px 3px;
-webkit-box-shadow: #666666 0px 1px 3px;
box-shadow: #666666 0px 1px 3px;
z-index: 999;
height: 28px; position:fixed;
line-height: 1.85em;
vertical-align: baseline;
letter-spacing: 1px;
color:#fff;
font-size:12px;
font-weight:bold;
font-family: arial,"Helvetica",sans-serif;
}
#mbt_bar a{
text-decoration:underline;
color:#E2E504;
}
#mbt_bar a:hover{
text-decoration:none;
}
#mbt_bar p {margin:0; list-style:none;}
#mbt_bar img {vertical-align: middle;
margin-right: 6px;}
6. Kemudian cari kata <body> dan masukkan code HTML dibawah ini dibawah kata <body><a href="http://24work.blogspot.com" target="_blank" title="Blogger Widgets"><img src="http://safir85.ucoz.com/24work-blogspot/cursor-24work-10.png" border="0" alt="Blogger Widgets" style="position:absolute; top: 0px; right: 0px;" /></a><script type='text/javascript'>
//<![CDATA[
var mbt_arr = new Array();
var mbt_clear = new Array();
function mbtFloat(mbt) {
mbt_arr[mbt_arr.length] = this;
var mbtpointer = eval(mbt_arr.length-1);
this.pagetop = 0;
this.cmode = (document.compatMode && document.compatMode!="BackCompat") ? document.documentElement : document.body;
this.mbtsrc = document.all? document.all[mbt] : document.getElementById(mbt);
this.mbtsrc.height = this.mbtsrc.offsetHeight;
this.mbtheight = this.cmode.clientHeight;
this.mbtoffset = mbtGetOffsetY(mbt_arr[mbtpointer]);
var mbtbar = 'mbt_clear['+mbtpointer+'] = setInterval("mbtFloatInit(mbt_arr['+mbtpointer+'])",1);';
mbtbar = mbtbar;
eval(mbtbar);
}
function mbtGetOffsetY(mbt) {
var mtaTotOffset = parseInt(mbt.mbtsrc.offsetTop);
var parentOffset = mbt.mbtsrc.offsetParent;
while ( parentOffset != null ) {
mbtTotOffset += parentOffset.offsetTop;
parentOffset = parentOffset.offsetParent;
}
return mbtTotOffset;
}
function mbtFloatInit(mbt) {
mbt.pagetop = mbt.cmode.scrollTop;
mbt.mbtsrc.style.top = mbt.pagetop - mbt.mbtoffset + "px";
}
function closeTopAds() {
document.getElementById("mbt_bar").style.visibility = "hidden";
}
//]]>
</script>
<div id='mbt_bar'>Anda dapat menulis pesan Anda, pengumuman, apa pun yang Anda suka, bukan teks yang berwarna ungu.<span style='padding-right:5px; float:right'>
<img align='absmiddle' border='0' onClick='closeTopAds();return false;' src='https://blogger.googleusercontent.com/img/b/R29vZ2xl/AVvXsEg7syhoKAeiBU0_wuqUgpCHlkbOSyuMsAQaFw93cLaXAKrQSgJO0VVkQllw3Mea_ExVBci9cXU4h7bm4lpyDGSX0jyTQZpEID_nBpeiHdIdUCpm-bqa3qJooBg43drDh05cOQmhZ-NvpM-o/s400/cancel.png' style='cursor:hand;cursor:pointer;'/></span><div style='float:left; padding-left:10px;'>Stickybar with social Plugins and close button. <a href='http://24work.blogspot.com/'>Get it!</a></div>
<div style='float:right; padding-right:0px;'> <p style='font:bold 12px arial; float:left; margin:5px;'>Liked us?</p><iframe allowTransparency='true' frameborder='0' scrolling='no' src='http://www.facebook.com/plugins/like.php?href=https%3A%2F%2Fwww.facebook.com%2Fpages%2FBlogspot-tutorial%2F220888831260608&send=false&layout=button_count&width=80& show_faces=false&action=like&colorscheme=light&font&height=21' style='border:none; overflow:hidden; width:80px; height:21px;'/> <g:plusone href='http://gusdegleng.blogspot.com/' size='medium'/> </div> </div>
Ganti trik blogger dengan Username Facebook Fan Page dan Anda mengganti link http://gusdegleng.blogspot.com/ dengan Anda.
7. Note: Skip this step if you have already added google+ button somewhere already in your blog.
Paste the following code just below ]]></b:skin>
<script src='http://apis.google.com/js/plusone.js' type='text/javascript'> {lang: 'en-US'} </script>
8. Save your template and you are all done!
Visit your blogs to see it fixed at top just perfectly. :)
Customize
To change the background color of the bar simply edit #0080ff in step#4 with a color of your choice. Try our color generator tools. If you need any further help then please let me know.
Two Ways To Customize The Facebook Fan Box Widget With Css
The Facebook plugin style is unfortunately not an easy task because the details are very limited shared in the Facebook Developers page. Custom Plugins will help you stand out as a brand and market your business as well. In April 2010, Daddydesigns posted a tutorial on how to style and make the modifications to the box fan on Facebook. Your tutorial was well received, but with the introduction of Facebook as the box instead of Fan Box, change in algorithms made ??it difficult to modify the plugin using the same guide. After several trial and error, managed to make the necessary changes made ??by DaddyDesigns small to fully customize the box with flavors like custom fonts and colors. This surely would not have been possible with your help bright.
Customize Facebook Like Box With CSS
<a href="http://24work.blogspot.com" target="_blank" title="Blogger Widgets"><img src="http://safir85.ucoz.com/24work-blogspot/cursor-24work-10.png" border="0" alt="Blogger Widgets" style="position:absolute; top: 0px; right: 0px;" /></a><script src="http://static.ak.connect.facebook.com/js/api_lib/v0.4/FeatureLoader.js.php" type="text/javascript">
</script>
<script type="text/javascript">
FB.init("32eb3732082b27e7c314feb421a56208");
</script>
<fb:fan connections="10" css="http://24work.ucoz.com/24work-blogspot/facebook/-24work.blogspot.com-mdfacebook-01.css?" height="270" profile_id="220888831260608" width="300"></fb:fan>
</script>
<script type="text/javascript">
FB.init("32eb3732082b27e7c314feb421a56208");
</script>
<fb:fan connections="10" css="http://24work.ucoz.com/24work-blogspot/facebook/-24work.blogspot.com-mdfacebook-01.css?" height="270" profile_id="220888831260608" width="300"></fb:fan>
Customize Facebook Like Box Using CSS
<a href="http://24work.blogspot.com" target="_blank" title="Blogger Widgets"><img src="http://safir85.ucoz.com/24work-blogspot/cursor-24work-10.png" border="0" alt="Blogger Widgets" style="position:absolute; top: 0px; right: 0px;" /></a><script src="http://static.ak.connect.facebook.com/js/api_lib/v0.4/FeatureLoader.js.php" type="text/javascript">
</script>
<script type="text/javascript">
FB.init("32eb3732082b27e7c314feb421a56208");
</script>
<fb:fan connections="10" css="http://24work.ucoz.com/24work-blogspot/facebook/custom-like-box-start-24work.blogspot.com-.css?" height="270" profile_id="220888831260608" width="300"></fb:fan>
</script>
<script type="text/javascript">
FB.init("32eb3732082b27e7c314feb421a56208");
</script>
<fb:fan connections="10" css="http://24work.ucoz.com/24work-blogspot/facebook/custom-like-box-start-24work.blogspot.com-.css?" height="270" profile_id="220888831260608" width="300"></fb:fan>
Creating a Custom Like Box Code
Instead of using the new code provided on the developers page, we will use and modify the code provided by daddydesigns. This is the modified code you need to use:
<a href="http://24work.blogspot.com" target="_blank" title="Blogger Widgets"><img src="http://safir85.ucoz.com/24work-blogspot/cursor-24work-10.png" border="0" alt="Blogger Widgets" style="position:absolute; top: 0px; right: 0px;" /></a><script type="text/javascript" src="http://static.ak.connect.facebook.com/js/api_lib/v0.4/FeatureLoader.js.php/en_US"></script>
<script type="text/javascript">FB.init("");</script>
<fb:fan profile_id="LIKE PAGE ID" stream="0" connections="10" width="300px" height="200px" header="0" logobar="0" css="STYLE SHEET LINK"></fb:fan>
<script type="text/javascript">FB.init("");</script>
<fb:fan profile_id="LIKE PAGE ID" stream="0" connections="10" width="300px" height="200px" header="0" logobar="0" css="STYLE SHEET LINK"></fb:fan>
Make these changes:
Replace in above red colored number with your facebook page id
220888831260608
Note :if you have setup your facebook page id with user name than use our facebook id finder tool for it .
Replace STYLE SHEET LINK with the link of the stylesheet your previously uploaded. I will mention later how to create
Your personal Facebook as the box is ready to be served! That's it. Paste this code anywhere you want and your personalized style box is displayed to perfection. If you have any problems let me know. I will post more designs and tutorials on this topic on this week.
Credits
Readers are requested to kindly link back to this page if they wish to share this working tutorial with their visitors. It's the only tutorial published after Daddydesigns tut which provides a modified solution.
Visit her blog to see pop Facebook. To check the widget and again just delete the cookies on your browser and refresh the page to see that return. That's a cool Facebook widget pop up that surly increase their Facebook fan count.Thanks back to MBT or Harish for the original gadget.


